One of the annoying things in Blogger is the space it automatically puts between widgets, whether it is on the sidebar or in the labels column. On investigating how to remove this, I discovered the following procedure.
Before making changes, one has to know the name of the component. If you look at the lists to the right of this post, you will see titles like Playing with Food and Eyeglass Lens Tinting. Each of these sections is a separate widget in Blogger; each can have margins set how one pleases. However, those are not the names of the widgets. Playing with Food, for example, is widget Label4. Eyeglass Lens Tinting is widget Label2. Because I know these labels, I can create CCS programming to set the margins as I see fit. Since I simply wanted to remove excess space above and below the widgets, I concentrated on those characteristics.
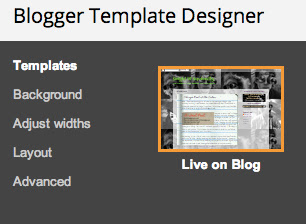
To search for the label, you will need to go to your blog's dashboard. On the left of the screen, there will be a menu. Click on Template. This brings up a screen with many pictures. The top two pictures are Live on Blog and Mobile. Under the Live on Blog picture are two buttons. Click on the Edit HTML button. This will open the HTML editing screen. Click anywhere inside the box containing the HTML, then press Cntl+F to search. Type in something you know about the widget. For example, I might type "Playing" (without the quotes, of course).&nbps; Press enter. In my case, the search brought me to a like that looked like this:
As you can see, I have my id as Label4. This is the widget for which I wish to create margins. Now, where to place the coding? All of your margin coding is inside a label called b:skin, so search for that. If there is a black triangle next to the line, click on it. This is where you will find all the margin coding. Within b:scan, you will find separate sections, such as /* Headings. Look for the item you wish to change. I made my changes under /* Widgets because I was changing widgets. To change the top and bottom margins for Label2, I entered the following:
#Label2{
margin-top: 20px;
margin-bottom: -15px;
}
This shrunk the distance between Label4 and Label2, creating a nicer look, in my opinion.
P.S. If you do the first search and do not find anything, you will have to scroll through the code and find all those little black triangles and click on. This opens up more coding to search.
Before making changes, one has to know the name of the component. If you look at the lists to the right of this post, you will see titles like Playing with Food and Eyeglass Lens Tinting. Each of these sections is a separate widget in Blogger; each can have margins set how one pleases. However, those are not the names of the widgets. Playing with Food, for example, is widget Label4. Eyeglass Lens Tinting is widget Label2. Because I know these labels, I can create CCS programming to set the margins as I see fit. Since I simply wanted to remove excess space above and below the widgets, I concentrated on those characteristics.
To search for the label, you will need to go to your blog's dashboard. On the left of the screen, there will be a menu. Click on Template. This brings up a screen with many pictures. The top two pictures are Live on Blog and Mobile. Under the Live on Blog picture are two buttons. Click on the Edit HTML button. This will open the HTML editing screen. Click anywhere inside the box containing the HTML, then press Cntl+F to search. Type in something you know about the widget. For example, I might type "Playing" (without the quotes, of course).&nbps; Press enter. In my case, the search brought me to a like that looked like this:
As you can see, I have my id as Label4. This is the widget for which I wish to create margins. Now, where to place the coding? All of your margin coding is inside a label called b:skin, so search for that. If there is a black triangle next to the line, click on it. This is where you will find all the margin coding. Within b:scan, you will find separate sections, such as /* Headings. Look for the item you wish to change. I made my changes under /* Widgets because I was changing widgets. To change the top and bottom margins for Label2, I entered the following:
#Label2{
margin-top: 20px;
margin-bottom: -15px;
}
This shrunk the distance between Label4 and Label2, creating a nicer look, in my opinion.
P.S. If you do the first search and do not find anything, you will have to scroll through the code and find all those little black triangles and click on. This opens up more coding to search.