Translate

Showing posts with label hard boil eggs. Show all posts

05 December 2013

Boiled eggs, a correction

As I ate that first batch of egg, many of them had the infamous green ring, which means the batch was overcooked.  Reviewing my old habits, I made a small discovery.  The 20-minute time used was for 18 eggs, not 12.  We had to do big batches of eggs for the renaissance fair, so I bought and boiled cartons of 18.  My sincerest apologies if I misled anybody.  I will have to recalculate my timing on a dozen eggs and update this how-to at a future date.

I am currently testing the eggs at 18 minutes.

As always, I welcome your comments.  Click on the Comment link below; it may say "No" or have a number in front of it.

26 November 2013

The Infamous Green Ring

Some of you may have heard about the infamous “green ring” of boiled eggs and how to avoid it.  Well, first you need to know what it is.  The green ring shows up around the outside edge of the yolk when an egg has been cooked too long.  Now that I have this technique down to a science, I seldom see green rings.  If you do follow the steps and still have egg yolks with green rings, simply reduce the cooking time or speed up the cold water at the end.  I may, in the future, purposely overboil some eggs to show you what I am talking about.

And here it is:
You see the dark ring around the edge of the yolk.  That is the sign of an overcooked egg.  If you follow my directions and get any eggs that look like this, shorten the cooking time for the next batch.  I have also seen a website that recommends stirring the eggs one or two times during cooking so as to avoid hot spots.

As always, I welcome your comments.  Click on the Comment link below; it may say "No" or have a number in front of it.

Boiling eggs, the technique

Here, then, are the steps on how I hard boil eggs.

Prep
Make sure your kitchen sink is completely empty.

Step 1:
Take the dozen eggs out of the refrigerator and place them on the counter.  You want the eggs to be room temperature before boiling.

Step 2:
Fill your kettle about half way with hot tap water.  Remember, you will be boiling off a lot of this water, so do not skimp.  You need to keep the eggs covered at all times.

Step 3:
Place your kettle on the stove and turn on the heat.  For gas stoves, make sure the flames are not wrapping around the bottom of the kettle.  For electric stoves, make sure you select a burner size that is smaller than the bottom of your kettle and select a medium-high setting.

Incorrect burner size.

Correct burner size.

Step 4:
Set your timer to 18 minutes.  You don’t want to be fooling around with this after you submerge your eggs, so get it ready now!

Step 5:
Keep an eye on the kettle.  Regardless of the axiom, a watched pot does boil, and you need to be ready when it does.

Water at simmer (small bubbles and steam rising)

Water at boil (also called full or rolling boil)

Step 6:
When your water is at boil, it is time to put in the eggs.  Place one egg on the slotted spoon.  Lower the egg slowly to the bottom of the kettle using the side of the kettle for a guide, like the picture below:
You may wish to wear a heat-resistant silicone oven mitt for this step, as you will be placing your hand in steam rising from the boiling water.  Roll the egg gently off of the spoon.  Repeat for remaining eggs.
As you can see, not one egg cracked.  Also, the water stopped boiling because the eggs absorbed some of the heat.  This is normal; the water will return to a boil.

Step 7:
Once the last egg is in, start your timer IMMEDIATELY!

Step 8:
When the timer goes off, take the kettle and place it in a sink.  Start running a slow stream of cold water into the kettle, as pictured below:
Keep the water running until you can put your finger into the water without feeling any heat.  This helps dissipate the residual heat and keeps the eggs from overcooking.  Overcooking results in a green ring around the yolk.  According to the American Egg Board, eggs turning green when overcooked is a natural chemical reaction, thus resulting in Green Eggs and Ham.

Step 9:
Remove the eggs and dry them with a clean kitchen towel before placing back in the carton.

Step 10:
Mark on the carton that the eggs are “boilt” and place them back into the refrigerator.

You now have hard-boiled eggs, as pictured below:
As always, I welcome your comments.  Click on the Comment link below; it may say "No" or have a number in front of it.

Hard boiled or hard cooked?

Some of you may be reading recipes and come across the need for hard cooked eggs instead of hard boiled.  Is there a difference? Well, that depends on who you talk to.  The American Egg Board has no definition for hard-boiled eggs; they consider the proper way to make eggs the hard-cooked method.  However, other Internet blogs (Eat4Fun, à la carte kitchen, et. al.) give some specific differences.

There is a difference in preparation.  Hard-boiled eggs get placed into boiling water; hard-cooked eggs get covered with cold water, heated to just boiling, and then removed from the stove to simmer in the heated water.

There is also said to be a difference in texture of the final products, but this is mostly noticeable by hard-core foodies.  Hard-cooked eggs are said to be less rubbery than hard-boiled.  The home cook will hardly ever notice a difference, which is why the two terms are pretty much interchangeable in recipes.  My preference is actually to have something a little stiffer to withstand the use of an egg slicer.

This series of posts uses the hard-boiled method.  My mother taught me this method, and it worked well for all those years at the renaissance fair.  Nobody complained about the eggs being cooked incorrectly or hard to peel.  So, on to the actual technique.

As always, I welcome your comments.  Click on the Comment link below; it may say "No" or have a number in front of it.

Boiling Eggs, the specifications

In order to successfully boil eggs, like in most endeavors, one needs to select the right equipment for the job.  First, of course, are the eggs.  The eggs being use are (at least in the United States) considered large eggs.  What makes an egg “large”? According to the American Egg Board, eggs are classified by weight per dozen.  For example, a dozen large eggs will weigh 11/2 pounds, meaning each large egg should be approximately 2 ounces.  Therefore, it is not based on physical size.  If your large eggs look small, weigh them, and the dozen should be approximately 11/2 pounds.  If they do not, somebody probably switched them for medium eggs in the grocery store to pay the lower price.  Remember, this technique is for large eggs.

Two quick notes about the freshness of eggs and boiling.  Eggs have air sacs in them.  This is why some eggs boil with a huge divot at one end.  To have smaller divots, use fresher eggs.  The problem with this is the fresher the egg the harder it will be to peel without taking off chunks of egg.  To be honest, I seldom have problems with this using my hard-boiled method.  Maybe one egg in a dozen will peel poorly.

Next is the kettle.  You will need to select a kettle that allows a dozen eggs to sit on the bottom in a single layer.
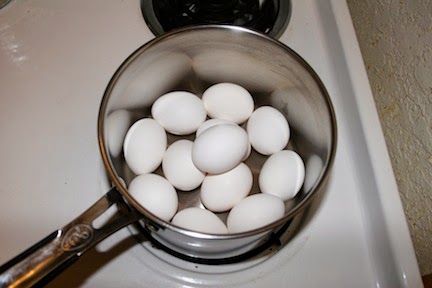
This kettle, as you can see, is too small to fit a dozen eggs, even though it is considered a larger size (3 quarts).
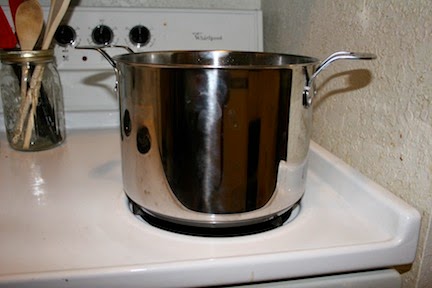
This kettle is the correct size.  It is my 6-quart stock pot.  There seems to be extra room for more eggs, if desired.  Personally, I only do a dozen at a time and use the carton the eggs came in to store them.  I just write “boiled” on the side to keep them separate from my raw eggs.

Now, you will also need a slotted spoon.  This is something I have discovered.  Using the slotted spoon to lower the eggs into the boiling water lessens the shock on the egg, decreasing the number of eggs that crack while submerging.  My preference is a slotted wooden spoon, although plastic would be acceptable.  Do not use metal.  Metal will transmit the heat from the water.

Finally, you will need some sort of timer.  Your cell phone should have some sort of timer built in.  If you do not have a digital, any timepiece that counts seconds will suffice.  I recommend against the old-fashioned wind-up timers as they are not always accurate.

Once you have all of these items, it is on to the step-by-step instructions.

As always, I welcome your comments.  Click on the Comment link below; it may say "No" or have a number in front of it.

How to make hard-boiled eggs

During my recent stint as custodian at a college, I have come across several young folks (and a few older folks) who do not have basic cooking skills.  This kind of shocked me because I was helping prepare dinner for our family by the time I was 9 years old.  Hence, I have decided to add some basic cooking techniques to the “How To . . . ” section of my blog.  Some may find these instructions ridiculously simplistic, but I am writing for those with no real cooking knowledge.  This first series of blogs, then, is on how I hard boil a dozen eggs.

What makes me qualified to be so presumptuous as to teach egg boiling? I have learned a few things along the way that have helped me produce properly boiled eggs for dozens of years.  How did I learn this stuff? Three main sources:
  • What my mother taught me.
  • What culinary school taught me.
  • What I learned cooking for a renaissance fair cast of over 100.
Combined, this is almost 50 years of experience, so use this guide if you have never boiled eggs or are getting bad results.

Start with the specifications, what you need and why you need it.
Then go on to the instructions. As always, I welcome your comments.  Click on the Comment link below; it may say "No" or have a number in front of it.